

Table of Contents
Introduction
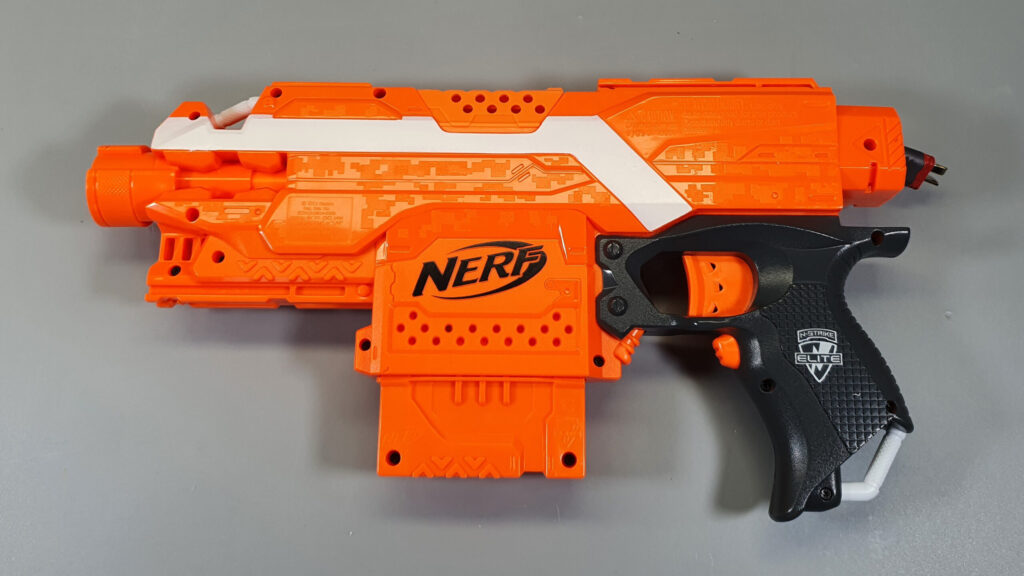
This Nerf Stryfe mod guide will explain how to modify Nerf guns. The Nerf Stryfe is accepted as the entry point for modding Nerf guns. The Stryfe can be found inexpensively and it’s fun without modifications. It can be purchased with a five shot magazine or bundles that contain attachments.
-The Stryfe is a magazine, flywheel blaster.
Most Nerf Stryfe mods will consist of removing the electronics and plastic parts that are not required. Some of these parts are referred to as internal locks. Their job is to make the blaster safer or work in a specific order. All of the wiring and electronic components will be removed. We will install new flywheels, motors, wires and cage. The orange plastic shell will also need trimming to fit the new flywheel cage.
Caution
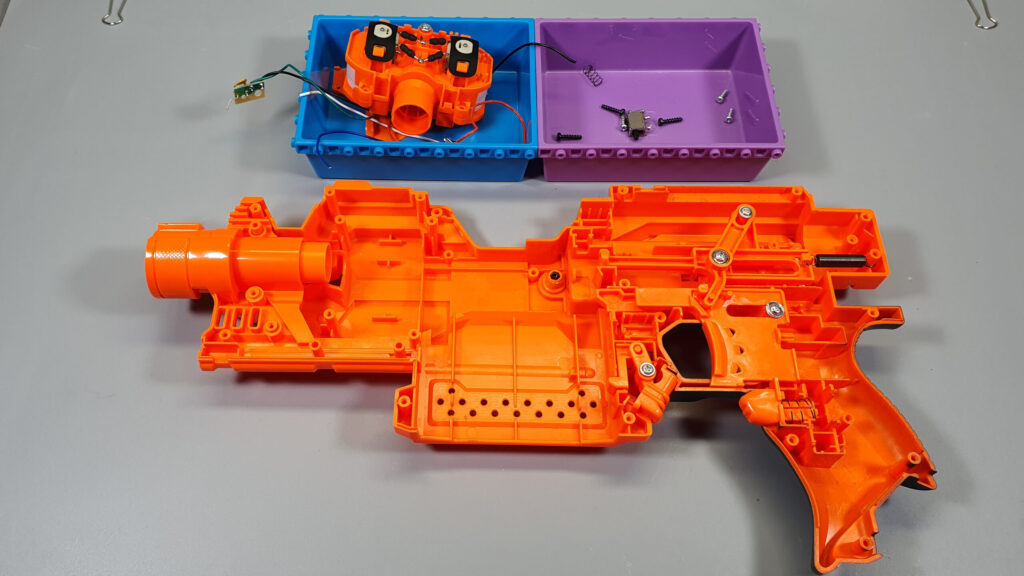
Disassembly:
Step 1: Remove the black screws located around the back of the blaster.
Step 2: Slowly split the blaster into two halves.
Step 3: Unscrew and remove the flywheel cage.
Step 4: Remove the plastic locks.
Step 5: Remove all the wires and switches. Cut the wires from the rev switch and place it to the side.

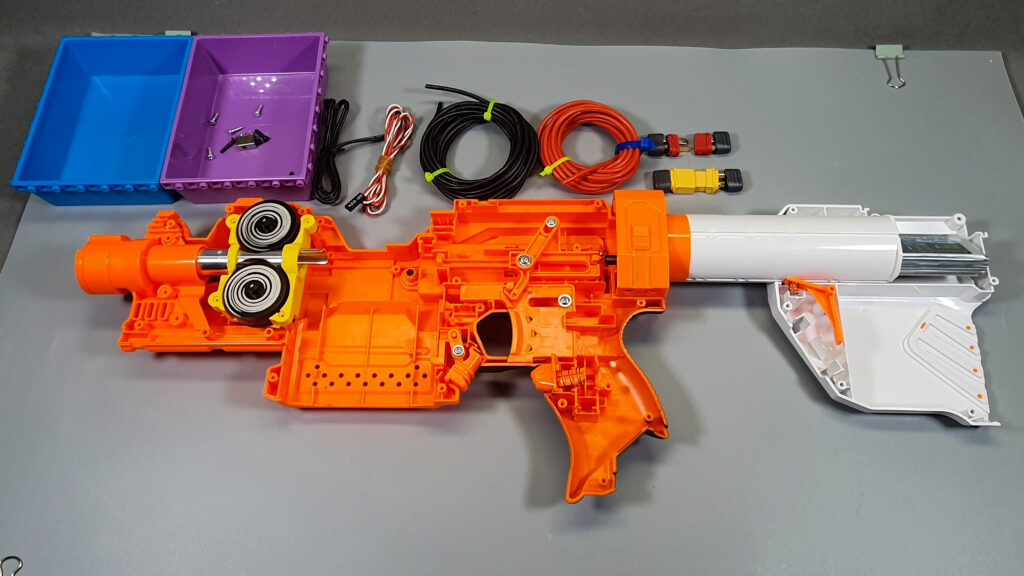
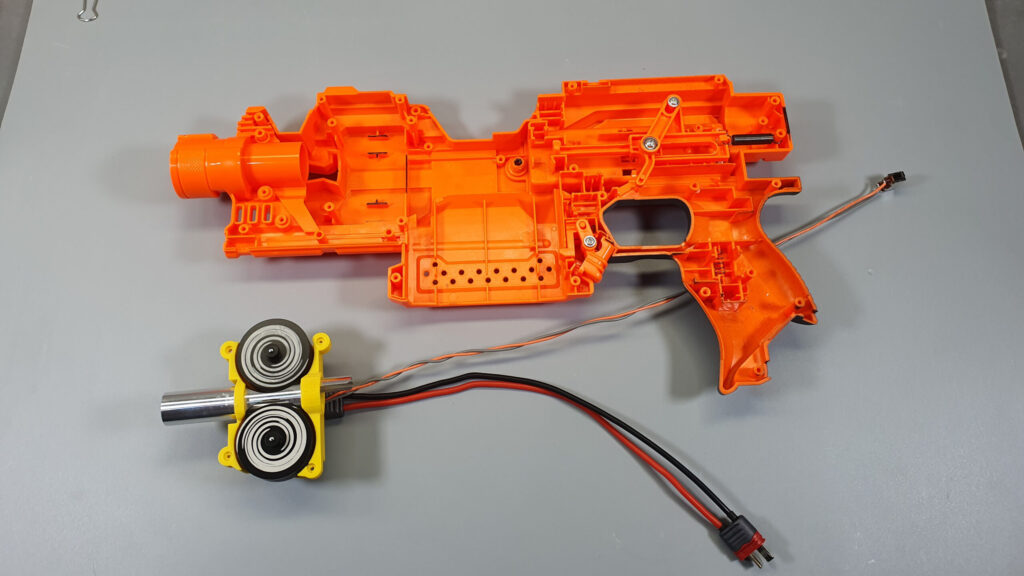
Prepare the Flywheel cage, motors and mosfet board:
Step 6: Place the motors into the flywheel cage. Fasten the motors with the provided screws.
Solder an x30 connector to the mosfet board.
Install the 3d printed spacers for the mosfet board between the motors and the board. Solder the motors to the board.
Measure wire from mosfet board to the rev switch trigger location. Solder the rev switch to the wires. Then solder the wires to the mosfet board. Route the wires from the flywheel cage to the grip. Install the rev switch back into the blaster grip.
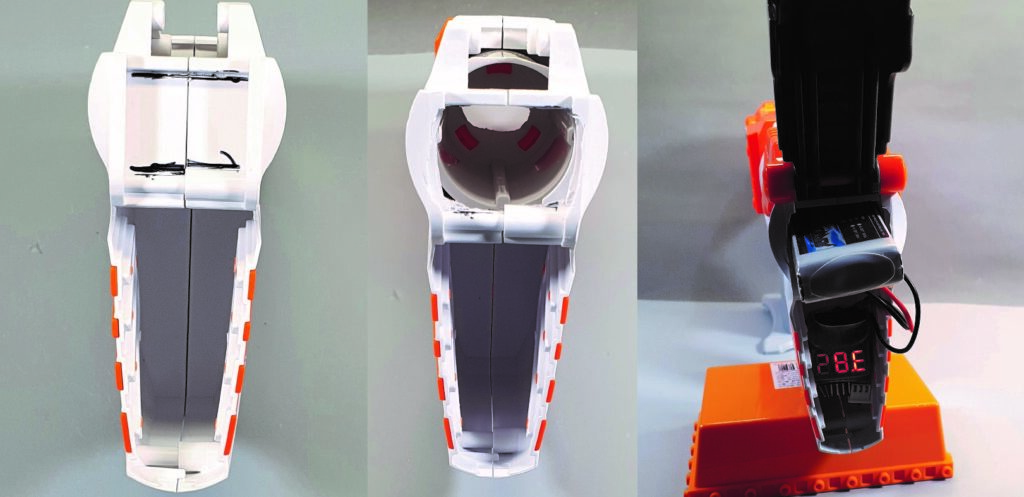
Step 7: Cut the blaster shell so that the new flywheel cage can be inserted. Install the flywheel cage with the 4 screws you removed when disassembling the blaster.
Step 8: Create a battery extension wire. X30 male connector and deans connector. The length will depend on the location of your battery. Connect a battery and push the rev trigger. The motors should turn.
Step 9: Install the flywheels.
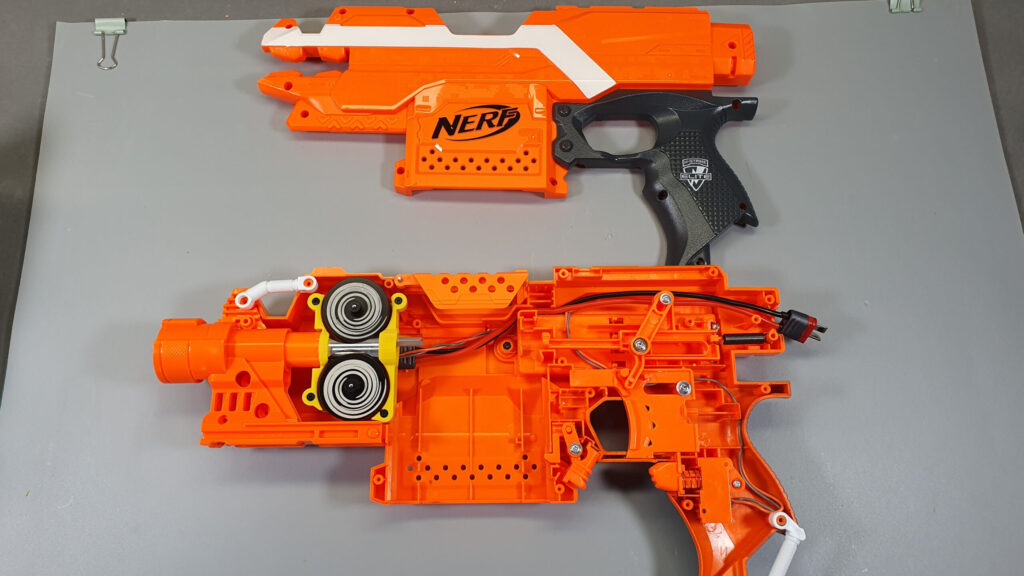
Re-assembly:
Step 10: Reassemble the blaster. Place the two halves together while avoiding pinching wires. Re-install the screws.
Bonus Step: I wanted to use a stock to hold my battery. I made some cuts to allow the battery to fit with a plastic cutter.

Parts:
- X2 Fanged Revamped Motors.
- Flywheel Cage Guide Tube.
- Mosfet Powerboard.
- A Pair of Flywheels.
- Stryfe 3D printed Flywheel Cage.
- Wire
- LiPo Battery
- Lipo Charger
- Battery Door -Optional
Tools:
- Screw driver
- Wire cutters
- Wire strippers
- Soldering Iron and solder.
- Plastic Cutter
Where to buy parts?
Nerf has a niche community; members create their own blasters or youtube channels and companies around it.
Luke from Out of Darts is well known within the sport of NERF. He was a film student who started to make videos about NERF modding. He since started to design and manufacture his own complete blasters. www.Outofdarts.com
3D Printing:
The first step of the Nerf Stryfe Mod Guide was to research available 3D printable flywheel cages compatible with the Nerf Stryfe. I liked the idea of having an aluminum guide tube. Here will be use the OFP Morpheus Cage. Use ABS or PETG because the motors get hot. PLA has a lower temperature tolerance and will eventually need to be replaced. Using a Prusa Mk3 3d printer, I printed 2 cages with Yellow ABS and 2 cages with purple PETG. The PETG cages had more stringing then I would have liked. I chose the better of the two abs prints. If you don’t have access to a 3D printer I recommend buying 3D printed parts from Luke @ Out Of Darts Nerf Stryfe Mod Guide..
Motors and Flywheels:
I went with the Fanged Revamped. These motors are branded by Drac who is another big name in the NERF world. They work well with 2S lipos.
The flywheels are from the containment crew. These guys take the sport of Nerf very seriously, their products are top performers.
Batteries:
I use a 2S LiPo that I bought from my “localish” RC hobby store. My battery is too large to fit in the stock battery tray, I will install it into a stock.
Electronics and Control Boards:
I opted for using Luke’s Mosfet board. A Mosfet is a type of transistor that is built for providing power, think of an electronic switch. They can be controlled by a smaller current, provided by a MCU or switch. The mosfet board simplifies the wiring process. The power comes right into the mosfet board and the switch input can be wired directly to the stock rev switch. I’ve seen a lot of modders use a switch, wired between the battery and flywheels. I don’t recommend this, having several amps of current running through a mechanical switch is less than ideal.